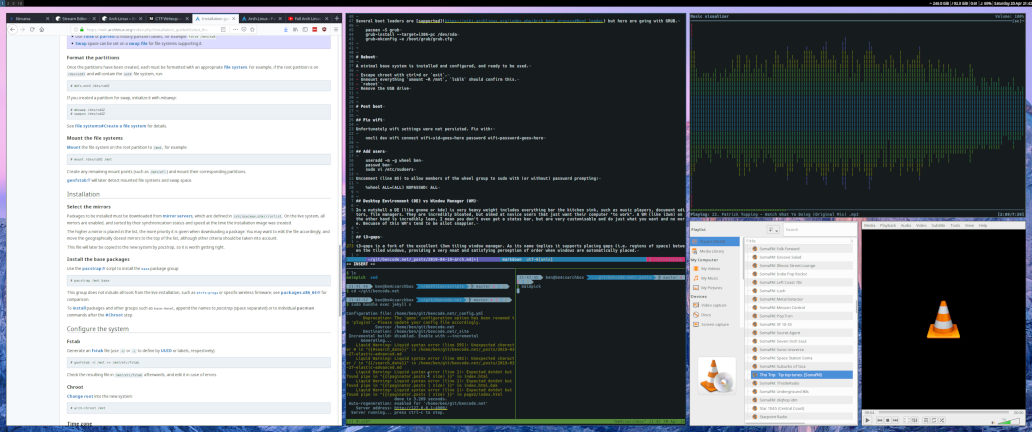
Install Arch Linux


After witnessing insane minimalism paired with a tiler (tiling window manager), knew it was my time to take the pilgrimage to Arch Linux. Some characteristics that make Arch unique:
- The Arch Way embody the principles behind Arch Linux; simplicity, modernity, pragmatism, user centrality and versatility.
- Forces one to build the system up by hand.
- This encourages you to question the role of each component of the system, and available options to satisfy that component (e.g. the terminal emulator).
- The result is a highly tailored and minimal system that meets precisely your needs.
- Practical and pragmatic documentation. The Arch Wiki is the gold standard when it comes to documentation.
- The Arch User Repository (AUR) is a treasure chest of pre-packaged useful recent software. Somehow every program I've ever needed has been available on AUR.
- Rolling upgrades.
Arch was born in 2001, when Canadian programmer Judd Vinet, inspired by the elegance of systems such as Slackware and the BSD's, set out to build his own distro based on a similar ethos. The first formal release, 0.1, dropped on March 11, 2002.
Boot disk
To bootstrap the install process, a boot key is the way to go. Obtain the latest iso image, and block write it to a USB drive using dd. dd (aka disk destroyer to some) trusts you know what you're doing and can destroy data very easily if not used correctly.
Use lsblk to determine the mapped device name (e.g. /dev/sdb). When ready, pull the trigger and flash the drive with arch:
dd if=Downloads/archlinux-2019.03.01-x86_64.iso of=/dev/sdb status="progress"
Boot the target system on the new boot drive. If all goes well, you will end up on a bash shell, in the temporary boot preparation system provided by Arch.
Post boot
Get network connectivity:
wifi-menu
ip a
Enable NTP:
timedatectl set-ntp true
Partitioning
UEFI (supports newer 64-bit based GPT) or BIOS (based on traditional MBR). If the below sys node doesn't exist, go BIOS:
ls /sys/firmware/efi/efivars
Determine the target block device (e.g. an SSD) for installation, using lsblk.
Assuming a BIOS compatible system, will go with fdisk (not gdisk) for the partitioning setup:
fdisk /dev/sda
fdisk shortcuts:
mhelppprint partition tableddeletennew
In a nutshell, blow away any existing partitions (d), and create 4 new (n) primary partitions. Note when specifying the last sector can size with +200M style syntax, +200M is 200MiB, +50G is 50GiB. I cut my ~500GB drive up into the following 4 partiions:
- 200M for boot partition (grub etc)
- 24G for swap (rule of thumb is 150% of total system memory)
- 100G for root partition
- ~340G+ for home partition (leave last sector unspecified in fdisk to use all remaining space)
We are aiming for a partition layout similar to this:
$ lsblk
NAME   MAJ:MIN RM   SIZE RO TYPE MOUNTPOINT
sda      8:0    0 465.8G  0 disk
├─sda1   8:1    0   200M  0 part /boot
├─sda2   8:2    0    24G  0 part [SWAP]
├─sda3   8:3    0   100G  0 part /
└─sda4   8:4    0 341.6G  0 part /home
Format partitions (file systems)
Apply ext4 (the fourth extended filesystem) to the boot, root and home partitions (i.e. all but the swap):
mkfs.ext4 /dev/sda1
mkfs.ext4 /dev/sda3
mkfs.ext4 /dev/sda4
Then setup the swap space:
mkswap /dev/sda2
swapon /dev/sda2
Now its time to mount these new partitions into the Arch bootstrapped system, so they be used.
The four partitions will be mounted into the current Arch boot preparation systems file system tree under /mnt so a chroot can occur, and then system installation. First mount the root partition, then the boot and home partitions within the root mount under /mnt/boot and /mnt/home respectively.
mount /dev/sda3 /mnt
mkdir -p /mnt/boot /mnt/home
mount /dev/sda1 /mnt/boot
mount /dev/sda4 /mnt/home
Setup pacman mirrors
Defined in /etc/pacman.d/mirrorlist. Higher mirrors in the list taken precedence over lower once, rearrange as desired:
##
## Arch Linux repository mirrorlist
## Filtered by mirror score from mirror status page
## Generated on 2019-04-01
##

## Australia
Server = http://mirror.internode.on.net/pub/archlinux/$repo/os/$arch
## Turkey
Server = http://mirror.veriteknik.net.tr/archlinux/$repo/os/$arch
Install Arch with pacstrap
The pacstrap script will install the base, and if desired other package groups, such as base-devel for common build related programs.
pacstrap /mnt base base-devel
fstab
So that the mount are automatically applied as part of the system boot process, add them to /etc/fstab as UUID's, which are more robust than device names which can change.
genfstab -U /mnt >> /mnt/etc/fstab
chroot
Now to change root into the new system, from the Arch boot preparation system:
arch-chroot /mnt
root password
Set the password for the root account with passwd
Localisation
Uncomment en_US.UTF-8 and UTF-8 in /etc/locale.gen, and generate:
locale-gen
Create /etc/locale.conf with:
LANG=en_US.UTF-8
Time zone
Symlink in the appropriate zone definition:
ln -sf /usr/share/zoneinfo/Australia/Canberra /etc/localtime
Run hwclock --systohc to generate /etc/adjtime
Networking
- Create
/etc/hostname, and define a name for the host. - Edit
/etc/hostsfor loopback based on the defined hostname above,127.0.1.1 myhostname.localdomain myhostname - Install NetworkManager which provides persistent network configuration across reboots,
pacman -S networkmanagerand enable itsystemctl enable NetworkManager
Boot loader (GRUB)
Several boot loaders are supported but here are going with GRUB.
pacman -S grub
grub-install --target=i386-pc /dev/sda
grub-mkconfig -o /boot/grub/grub.cfg
A minimal base system is installed and configured, and ready to be used.
- Escape chroot with ctrl+d or
exit. - Unmount everything
umount -R /mnt,lsblkshould confirm this. reboot- Remove the USB drive
Wifi
Unfortunately wifi settings were not persisted. Fix with network manager:
nmcli dev wifi connect wifi-sid-goes-here password wifi-password-goes-here
Also make sure to that wifi-menu is functional, by installing the dialog package. netctl is useful for troubleshooting. Ensure that the network profile for the wifi is enabled using netctl.
See archwiki:
nmcli device wifi listsniff currently available wifi ssids in rangenmcli connection showshow active connection/snmcli device wifi connect Jeneffer password S3CR3Tconnect to ssidnmcli device wifi connect Jeneffer password S3CR3T hidden yesconnect to hidden ssidnmcli connection up uuid UUIDreconnect a disconnected interfacenmcli devicelist all interfaces and their statemcli device disconnect wlp3s0disconnect an interfacenmcli radio wifi offdisable wifi radio
Add users
useradd -m -g wheel ben
passwd ben
sudo vi /etc/sudoers
Uncomment (line 85) to allow members of the wheel group to sudo with (or without) password prompting:
%wheel ALL=(ALL) NOPASSWD: ALL
GPU drivers
I've got a mix of machines with nvidia and amd accelerators. Just follow the bouncing ball on the appropriate arch wiki:
Once installed verify with some benchmarks, before installing steam. Install glmark2 from the AUR, then bench.
$ glmark2
=======================================================
    glmark2 2014.03
=======================================================
    OpenGL Information
    GL_VENDOR:     X.Org
    GL_RENDERER:   AMD Radeon (TM) RX 480 Graphics (POLARIS10, DRM 3.35.0, 5.4.2-arch1-1, LLVM 9.0.0)
    GL_VERSION:    4.5 (Compatibility Profile) Mesa 19.2.7
=======================================================
[build] use-vbo=false: FPS: 9521 FrameTime: 0.105 ms
[build] use-vbo=true: FPS: 14981 FrameTime: 0.067 ms
[texture] texture-filter=nearest: FPS: 15094 FrameTime: 0.066 ms
[texture] texture-filter=linear: FPS: 15087 FrameTime: 0.066 ms
[texture] texture-filter=mipmap: FPS: 14676 FrameTime: 0.068 ms
[shading] shading=gouraud: FPS: 14161 FrameTime: 0.071 ms
[shading] shading=blinn-phong-inf: FPS: 14188 FrameTime: 0.070 ms
[shading] shading=phong: FPS: 14027 FrameTime: 0.071 ms
[shading] shading=cel: FPS: 14157 FrameTime: 0.071 ms
[bump] bump-render=high-poly: FPS: 11664 FrameTime: 0.086 ms
[bump] bump-render=normals: FPS: 15074 FrameTime: 0.066 ms
[bump] bump-render=height: FPS: 14998 FrameTime: 0.067 ms
libpng warning: iCCP: known incorrect sRGB profile
[effect2d] kernel=0,1,0;1,-4,1;0,1,0;: FPS: 16919 FrameTime: 0.059 ms
libpng warning: iCCP: known incorrect sRGB profile
[effect2d] kernel=1,1,1,1,1;1,1,1,1,1;1,1,1,1,1;: FPS: 16612 FrameTime: 0.060 ms
[pulsar] light=false:quads=5:texture=false: FPS: 15541 FrameTime: 0.064 ms
libpng warning: iCCP: known incorrect sRGB profile
[desktop] blur-radius=5:effect=blur:passes=1:separable=true:windows=4: FPS: 8164 FrameTime: 0.122 ms
libpng warning: iCCP: known incorrect sRGB profile
[desktop] effect=shadow:windows=4: FPS: 8348 FrameTime: 0.120 ms
[buffer] columns=200:interleave=false:update-dispersion=0.9:update-fraction=0.5:update-method=map: FPS: 1189 FrameTime: 0.841 ms
[buffer] columns=200:interleave=false:update-dispersion=0.9:update-fraction=0.5:update-method=subdata: FPS: 1467 FrameTime: 0.682 ms
[buffer] columns=200:interleave=true:update-dispersion=0.9:update-fraction=0.5:update-method=map: FPS: 1221 FrameTime: 0.819 ms
[ideas] speed=duration: FPS: 5648 FrameTime: 0.177 ms
[jellyfish] : FPS: 13110 FrameTime: 0.076 ms
[terrain] : FPS: 1939 FrameTime: 0.516 ms
[shadow] : FPS: 12114 FrameTime: 0.083 ms
[refract] : FPS: 3845 FrameTime: 0.260 ms
[conditionals] fragment-steps=0:vertex-steps=0: FPS: 14620 FrameTime: 0.068 ms
[conditionals] fragment-steps=5:vertex-steps=0: FPS: 15881 FrameTime: 0.063 ms
[conditionals] fragment-steps=0:vertex-steps=5: FPS: 16657 FrameTime: 0.060 ms
[function] fragment-complexity=low:fragment-steps=5: FPS: 17256 FrameTime: 0.058 ms
[function] fragment-complexity=medium:fragment-steps=5: FPS: 17571 FrameTime: 0.057 ms
[loop] fragment-loop=false:fragment-steps=5:vertex-steps=5: FPS: 17570 FrameTime: 0.057 ms
[loop] fragment-steps=5:fragment-uniform=false:vertex-steps=5: FPS: 17540 FrameTime: 0.057 ms
[loop] fragment-steps=5:fragment-uniform=true:vertex-steps=5: FPS: 17667 FrameTime: 0.057 ms
=======================================================
                                  glmark2 Score: 12379
=======================================================
If the GPU driver is functional, can pull metrics about your device from the kernel:
$ sudo cat /sys/kernel/debug/dri/0/amdgpu_pm_info
Clock Gating Flags Mask: 0x3fbcf
        Graphics Medium Grain Clock Gating: On
        Graphics Medium Grain memory Light Sleep: On
        Graphics Coarse Grain Clock Gating: On
        Graphics Coarse Grain memory Light Sleep: On
        Graphics Coarse Grain Tree Shader Clock Gating: Off
        Graphics Coarse Grain Tree Shader Light Sleep: Off
        Graphics Command Processor Light Sleep: On
        Graphics Run List Controller Light Sleep: On
        Graphics 3D Coarse Grain Clock Gating: Off
        Graphics 3D Coarse Grain memory Light Sleep: Off
        Memory Controller Light Sleep: On
        Memory Controller Medium Grain Clock Gating: On
        System Direct Memory Access Light Sleep: Off
        System Direct Memory Access Medium Grain Clock Gating: On
        Bus Interface Medium Grain Clock Gating: Off
        Bus Interface Light Sleep: On
        Unified Video Decoder Medium Grain Clock Gating: On
        Video Compression Engine Medium Grain Clock Gating: On
        Host Data Path Light Sleep: On
        Host Data Path Medium Grain Clock Gating: On
        Digital Right Management Medium Grain Clock Gating: Off
        Digital Right Management Light Sleep: Off
        Rom Medium Grain Clock Gating: On
        Data Fabric Medium Grain Clock Gating: Off
        Address Translation Hub Medium Grain Clock Gating: Off
        Address Translation Hub Light Sleep: Off

GFX Clocks and Power:
        300 MHz (MCLK)
        300 MHz (SCLK)
        300 MHz (PSTATE_SCLK)
        300 MHz (PSTATE_MCLK)
        800 mV (VDDGFX)
        7.162 W (average GPU)

GPU Temperature: 31 C
GPU Load: 25 %
MEM Load: 7 %

UVD: Disabled

VCE: Disabled
Essential applications (user space)
If you've gone down the window manager (i.e. tiler) route, there is literally nothing, its a minimalist wasteland. Here's the progs I use to support my specific computer based workflows (as a software dev and terminal fan).
My 2c, make sure to consider suckless programs.
- AUR helper:
yay(install this first) - Audio:
alsamixer,alsa-utils,pulseaudio,pulseaudio-alsa,pulsemixer - Bluetooth:
bluez,bluez-utils,pulseaudio-bluetooth - Database:
postgres - Dev:
gcc,python,golang,java - Documenation:
pandoc,texlive-core,texlive-bin,texlive-latexextra,texlive-publishers,texlive-fontsexta,troff,pdflatex - DVD/CD burning:
dvd+rw-tools,cdrtools,lame - Games:
steam(enable multilib pacman repo),nethack - Fonts:
nerd-fonts-fira-code,ttf-fira-code,ttf-font-awesome,ttf-ms-fonts,ttf-linux-libertine,ttf-dejavu,ttf-inconsolata,ttf-ubuntu-font-family(steer clear of noto fonts due to glyph bug with Xft which crashesst) - Font management:
xorg-xfontsel(GUI for specifying a font in XLFD),xorg-xfontsel(list fonts by name in X logical font description aka XLFD format) - File manager:
nnn - Hypervisor (VM's):
vbox - Image viewer:
sxiv - IRC client:
irssi - Mail:
neomutt,isync,msmtp,lynx - Music player:
mpd,mpc,ncmpcpp - Networking:
networkmanager,wifi-menu,dialog - Notifications:
dunst,dzen2 - PDF viewer:
mupdf - Screenshots:
maim,xclip - Shells:
dash,zsh - System monitor:
conky(handy for piping intodzen2) as per my~/bin/popinfo2script - Terminal emulator:
st - Text editor:
neovim,python-pynvim - Video player:
vlc - VPN:
openvpn - Window manager:
dwm
Desktop Environment (DE) vs Window Manager (WM)
In a nutshell a DE (like gnome or kde) is heavy weight includes everything bar the kitchen sink, such as music players, document editors, file managers, status bars, network managers, start menus, etc. They are incredibly bloated, but aimed at novice users that just want their computer "to work". A WM (like dwm or i3) on the other hand is incredibly lean, I mean you don't even get a status bar, but are very customisable and do just what you want and no more. Because of this WM's tend to be allot snappier. I personally prefer using a WM, and more specifically a tiling WM (aka a tiler) and highly recommend dwm:
Because dwm is customized through editing its source code [C], it's pointless to make binary packages of it. This keeps its userbase small and elitist. No novices asking stupid questions.
I have started to form some of my own opinions around the use of a tiler:
- Gaps between windows are literally a waste of space. Don't do this.
- Don't bother with lots of the cosmetic ricing hacks out there, its all bloat.
- Toolbars (such as
polybar) display redundant information at the cost of cognitive overload and wasted screen real-estate. If I want to know the time I look at my watch.
dwm
I've have recently discovered suckless, and their philosophy towards software really resonates strongly with me.
We are the home of quality software such as dwm, dmenu, st and plenty of other tools, with a focus on simplicity, clarity and frugality. Our philosophy is about keeping things simple, minimal and usable.
dwm is their minimal tiling window manager.
Because dwm is customized through editing its source code, it's pointless to make binary packages of it. This keeps its userbase small and elitist. No novices asking stupid questions.
The configuration of dwm is done by creating a custom config.h, by editing the config.def.h header, and (re)compiling the source code using the provided makefile.
pacman -Sy xorg-server xorg-xinit
pacman -Sy xf86-video-amdgpu
pacman -Sy dmenu git
Clone the dwm Git repo, and my patches:
git clone https://git.suckless.org/dwm
git clone https://github.com/bm4cs/dots.git
cd ~/dotfiles && ./install.sh
Apply patches for specific features wanted. The only patch I apply is center:
Add an iscentered rule to automatically center clients on the current monitor.
This lets you define rules in config.def.h for certain programs (e.g. pulsemixer) that you'd like to launch center screen, by adding an iscentered rule to automatically center clients on the current monitor:
static const Rule rules[] = {
    /* xprop(1):
     *    WM_CLASS(STRING) = instance, class
     *    WM_NAME(STRING) = title
     */
    /* class      instance       title       tags mask     iscentered     isfloating   monitor */
    { "Gimp",     NULL,          NULL,       0,            0,             1,           -1 },
To you can see the WM_CLASS and WM_NAME properties of the X window are used by the rule chain to figure out what rules to apply. To determine these values, use xprop which will give you a mouse cursor to select the window of the running program you are interested in, and will dump its property to stdout:
$ xprop WM_CLASS
WM_CLASS(STRING) = "st-256color", "st-256color"

$ xprop WM_CLASS
WM_CLASS(STRING) = "st-256color", "st-256color"

$ xprop WM_NAME
WM_NAME(UTF8_STRING) = "vim"
Build and install:
make && sudo make install
To autostart dwm:
Edit ~/.xinitrc with following:
exec dwm
Then startx. A black screen desktop should appear. This is good.
i3-gaps
i3-gaps is a fork of the excellent i3wm tiling window manager. As its name implies it supports placing gaps (i.e. regions of space) between the tiled windows, providing a very neat and satisfying perception of order when windows are automatically laid out.
pacman -S xorg-server xorg-xinit
pacman -S xf86-video-amdgpu
pacman -S i3-gaps i3status rxvt-unicode dmenu
To autostart i3:
Edit ~/.xinitrc with following:
exec i3
Then startx. A black screen desktop should appear. This is good.
Default applications
Programs that handle arbitrary files (e.g. web browsers, irc clients, file managers) delegate to a general purpose resource handler. XDG MIME Applications is the ubiquitous option here, and is not only an implementation, but a full blown specification.
To check a default program to be used based on MIME type:
xdg-mime query default text/plain
Or, if unsure of the MIME type, to check a default program based on a sample input file:
xdg-mime query filetype 2016-01-12-jdbc-overflow.markdown
To set a default handler, the program needs a, the program needs a .desktop launcher. First make sure one exists:
$ locate -i nvim.desktop
/usr/share/applications/nvim.desktop
Then bind it as the default for a given file (MIME) type:
xdg-mime default nvim.desktop text/plain
Test it out:
xdg-open 2018-01-08-pki.markdown
These are stored in ~/.local/mimeapps.list.
Ricing
The term ricing originates from the auto enthusiast community, and was used predominantly as a perjorative to describe people who make modifications to their (usually Japanese) cars that add visual flair, but don't improve performance. In the context of unixporn, it means customizing your desktop to make it look snazzy.
This rice was used on i3. While I enjoyed my brief time using this excellent tiler, I have moved to using suckless dwm. While these ricing hacks should apply to various window managers and tilers, I havent verified.
Wallpaper
pacman -S feh
Add a task runner to ~/.config/i3/config to always set the wallpaper whenever i3 runs.
exec_always --no-startup-id feh --bg-scale /home/ben/Pictures/Wallpapers/nature3.jpg
Sound
pacman -S alsa-utils
Can now run alsamixer to manage the sound card.
Load Xresources at startup
Used to customise the appearance of graphical (i.e. X!) apps such as dwm, st and urxvt.
Ensure that .XResouces is read in when starting X by placing this in your ~/.xinitrc:
xrdb -merge ~/.Xresources &
If you dont have an ~/.Xresources of your own, checkout my dots.
Remember to run xrdb ~/.Xresources after editing it.
Making GTK and QT apps pretty
pacman -S lxappearance gtk-chtheme gtk-engine-murrine gtk-engines gnome-themes-extra qt5ct
Define the following environment variables to override default QT styling:
export QT_STYLE_OVERRIDE=adwaita
export QT_QPA_PLATFORMTHEME="qt5ct"
export QT_AUTO_SCREEN_SCALE_FACTOR=0
This is a worth while endevour to take. I now have a very tailored system that works exactly how I want, without any bloat, and its FAST. Finally if interested, all my configuration from vim to st and dwm is in my dots repo.
I've have recently discovered suckless, and their philosophy towards software really resonates strongly with me.
We are the home of quality software such as dwm, dmenu, st and plenty of other tools, with a focus on simplicity, clarity and frugality. Our philosophy is about keeping things simple, minimal and usable.